
Install & your first bundle
See it working first: demo.getbundleboss.com is a live store running BundleBoss Pro. Build a box, open the configurator, add things to the cart. It resets nightly.
In a hurry? Use the wizard. Create a bundle with the wizard walks you through it: pick what you are making, add products, preview, publish. The steps below are the full manual route, and the wizard writes exactly the same kind of bundle.
Before you start
Section titled “Before you start”BundleBoss needs WooCommerce 8.0 or newer, WordPress 6.4+ and PHP 8.0+. WooCommerce must be active first; if it is not, BundleBoss shows a notice and waits.
Install the plugin
Section titled “Install the plugin”- Download the plugin zip (the free build from WordPress.org, or your Pro build from your account).
- In WordPress admin go to Plugins → Add New → Upload Plugin, choose the zip, and click Install Now.
- Click Activate.
The first time you open an admin screen, a short pointer tour offers to walk you through creating a bundle. You can take it or skip it; it retires itself once you have one bundle.
Build your first bundle
Section titled “Build your first bundle”1. Create a new product
Section titled “1. Create a new product”Go to Products → Add New. Give it a title (for example “Starter Hoodie Pack”) and, optionally, a description and a featured image. The featured image is the main photo shown in your shop.
2. Set the product type to Bundle
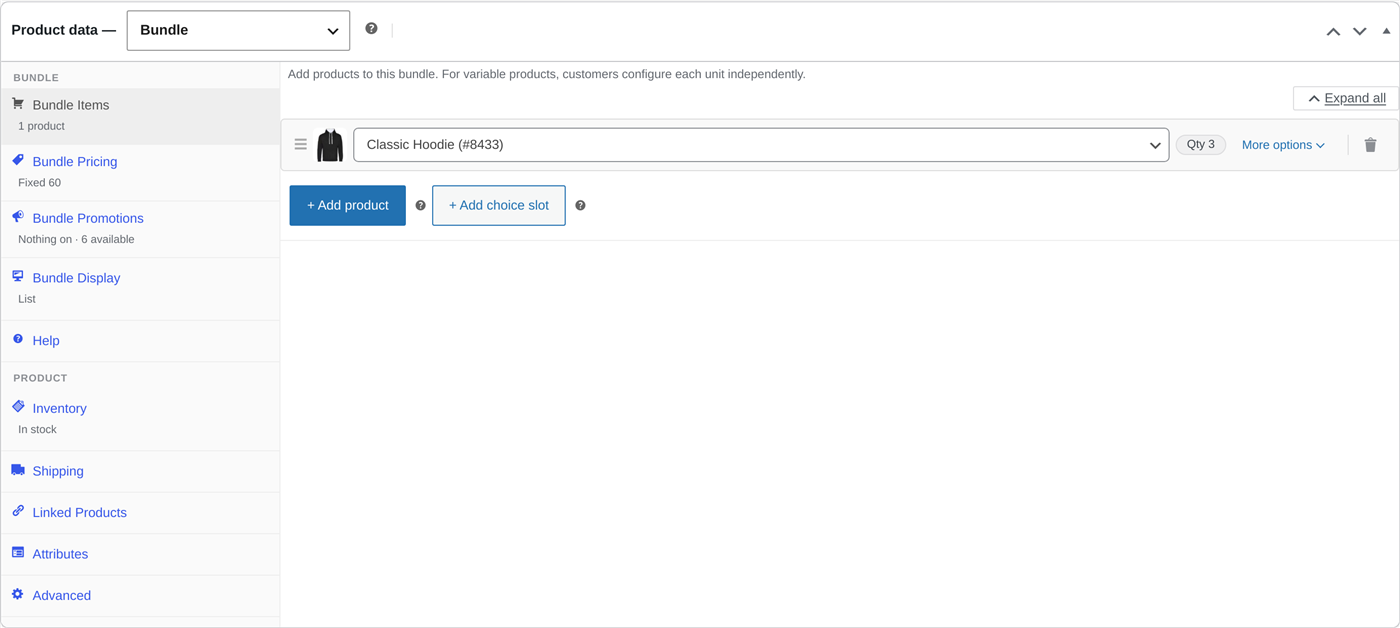
Section titled “2. Set the product type to Bundle”In the Product data dropdown (just above the bundle panels), choose Bundle. The tabs below switch to bundle mode straight away.
3. Add your items
Section titled “3. Add your items”Open the Bundle Items tab and add a slot for each product in the pack:
- Click + Add Product and type at least two characters to search. Pick a simple or variable product.
- Set Min and Max quantity. Equal values (say 2 and 2) fix the quantity; a range (1 to 3) gives the customer a +/- stepper.
- Tick Optional if the customer may leave this item out entirely.
- For a variable product you can restrict the variations offered, for example only Black and Grey rather than every colour.
- Drag the handle to reorder slots.

Want customers to choose the product, not just the colour? That is a choice slot (Pro). The steps above are for slots where you, the shop owner, decide the product.
4. Choose how it looks
Section titled “4. Choose how it looks”At the top of the Bundle Items panel, Layout sets the page layout (List, Grid, Step by step, or Configurator), and Multiple items sets how the units of a single multi-quantity item are shown (Stacked, Compact cards, Table, or the Pro Quantity grid). The defaults are fine to start. The Layouts guide explains which combination suits which kind of store.
5. Decide the price
Section titled “5. Decide the price”On the Bundle Pricing tab, choose a pricing mode:
- Percentage discount: the total is the sum of the chosen items minus your discount (enter
0for none). - Set amount off: a flat amount off the items (for example £5 off).
- Fixed bundle price: the bundle always costs exactly what you set, and customers see how much they save versus buying separately.
You can also add quantity discount tiers (buy 2 or more for 15% off) and a bundle stock cap. See Pricing & discounts for the detail.
6. Shipping (optional)
Section titled “6. Shipping (optional)”On the Shipping tab, set weight and dimensions as usual and pick a bundle weight mode: Automatic adds up the weight of the items the customer actually chose, Manual always uses the weight you set.
7. Promotions (optional)
Section titled “7. Promotions (optional)”Add a sale countdown with a start and end time, or a “You might also like” carousel of other bundles. See Promotions.
8. Publish
Section titled “8. Publish”Click Publish. The “From £X” price is worked out automatically, and the storefront immediately shows the full bundle configurator.
What customers see
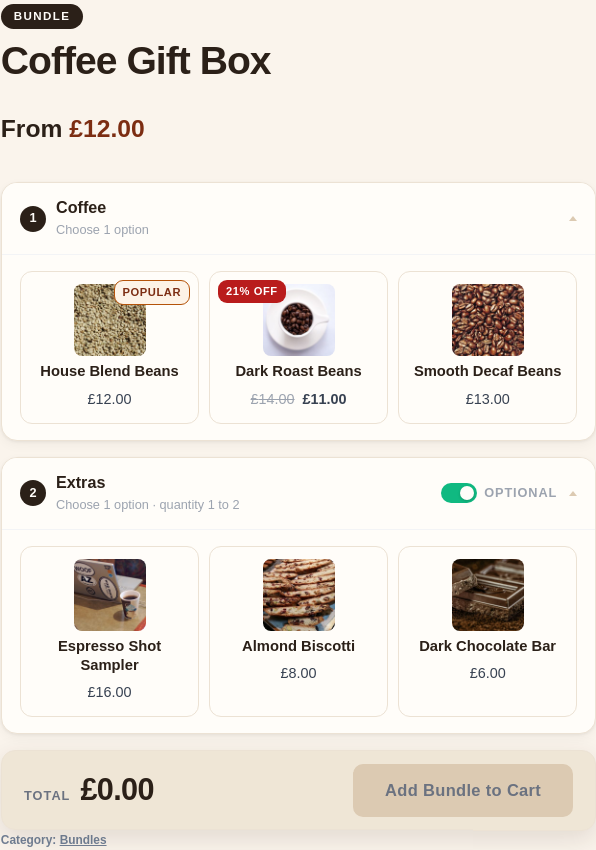
Section titled “What customers see”On the product page each slot shows its photo, name and quantity. Variable slots show a picker per unit, optional slots show an include toggle, and a live total updates as choices are made. Add Bundle to Cart stays disabled until every required slot is complete, so an incomplete order can never reach the cart.
Next steps
Section titled “Next steps”- Bundle items & quantities: the slot options in full
- Pricing & discounts: tiers, fixed pricing, stock caps
- Layouts & which to use: pick the right presentation
- Choice slots Pro: let customers pick the products