
Product options (no variations)
Product options are part of the Builder. A product with no sets attached behaves exactly as before.
The idea
Section titled “The idea”A shop with twelve colours and seven sizes faces 84 WooCommerce variations for one hoodie: generate them, price them, keep them straight, wait while the admin loads. Option sets are the way out. You define a list once, attach it to a simple product, and shoppers pick from the same swatch chips and size pills a variable product would show. No variations are created, so there is nothing to generate or scroll through: one product, one stock line.
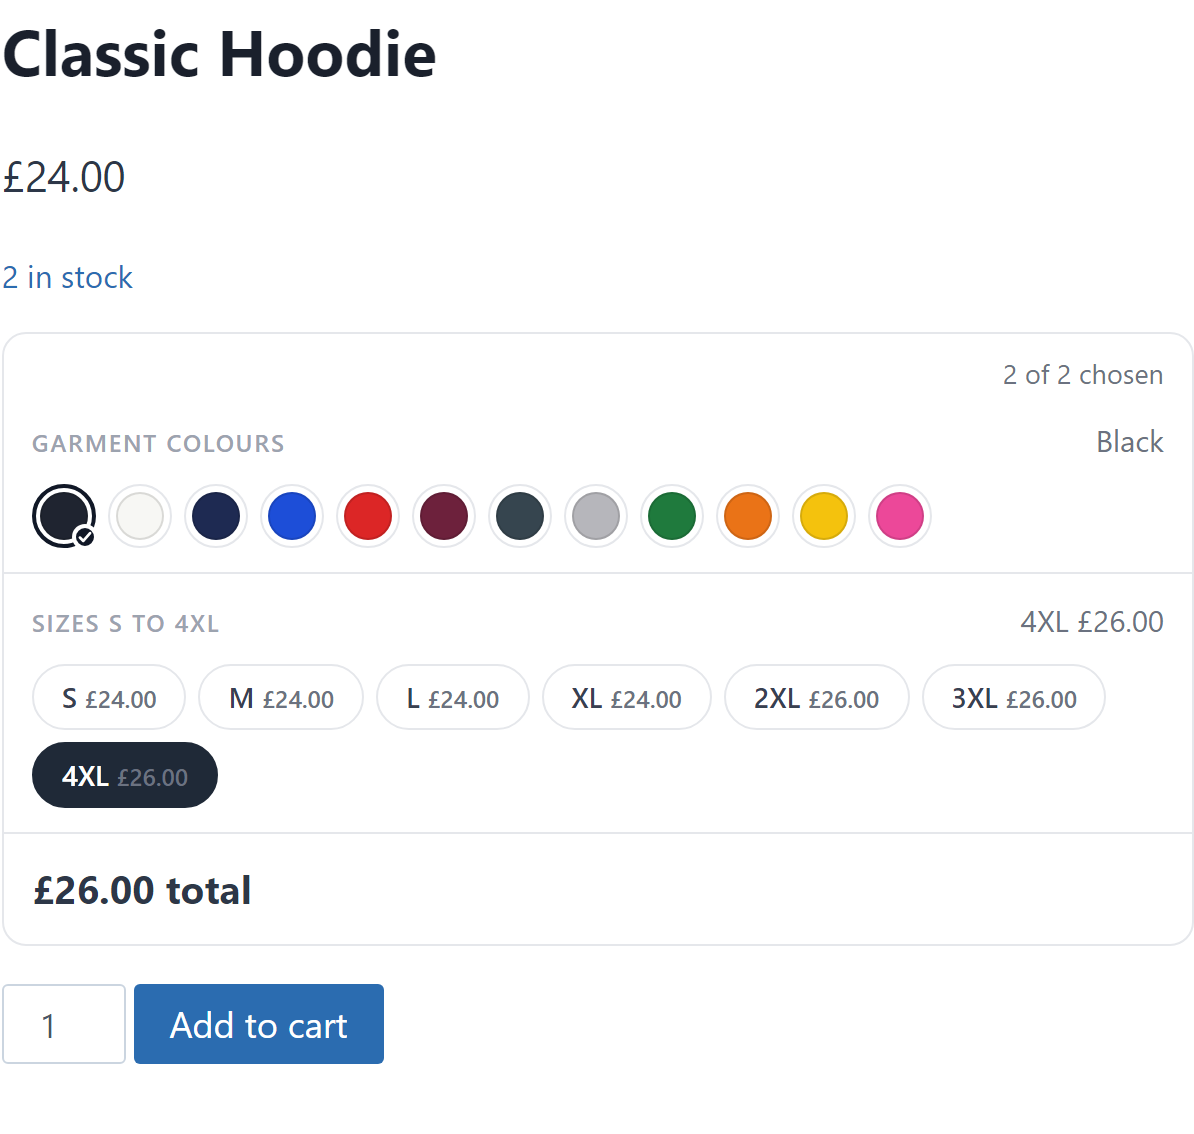
Both live side by side. Reach for option sets when the choice does not need its own stock or SKU (most colour and size runs). Keep real variations when each combination must track its own stock. You can mix the two in one bundle.
Two kinds of set
Section titled “Two kinds of set”When you create a set, the first thing you pick is what kind it is:
- A list of choices. Named options, each with its own price: colours, finishes, or set sizes like Small, Medium, Large. The shopper picks one.
- A measured size. Priced by dimensions and a rate, for anything sold by the metre or the square metre: cut-to-size banners, fabric, rope, worktops. The shopper types a size, or picks a ready-made one.
Most shops only ever need the first. The rest of this guide covers both.
Create a set
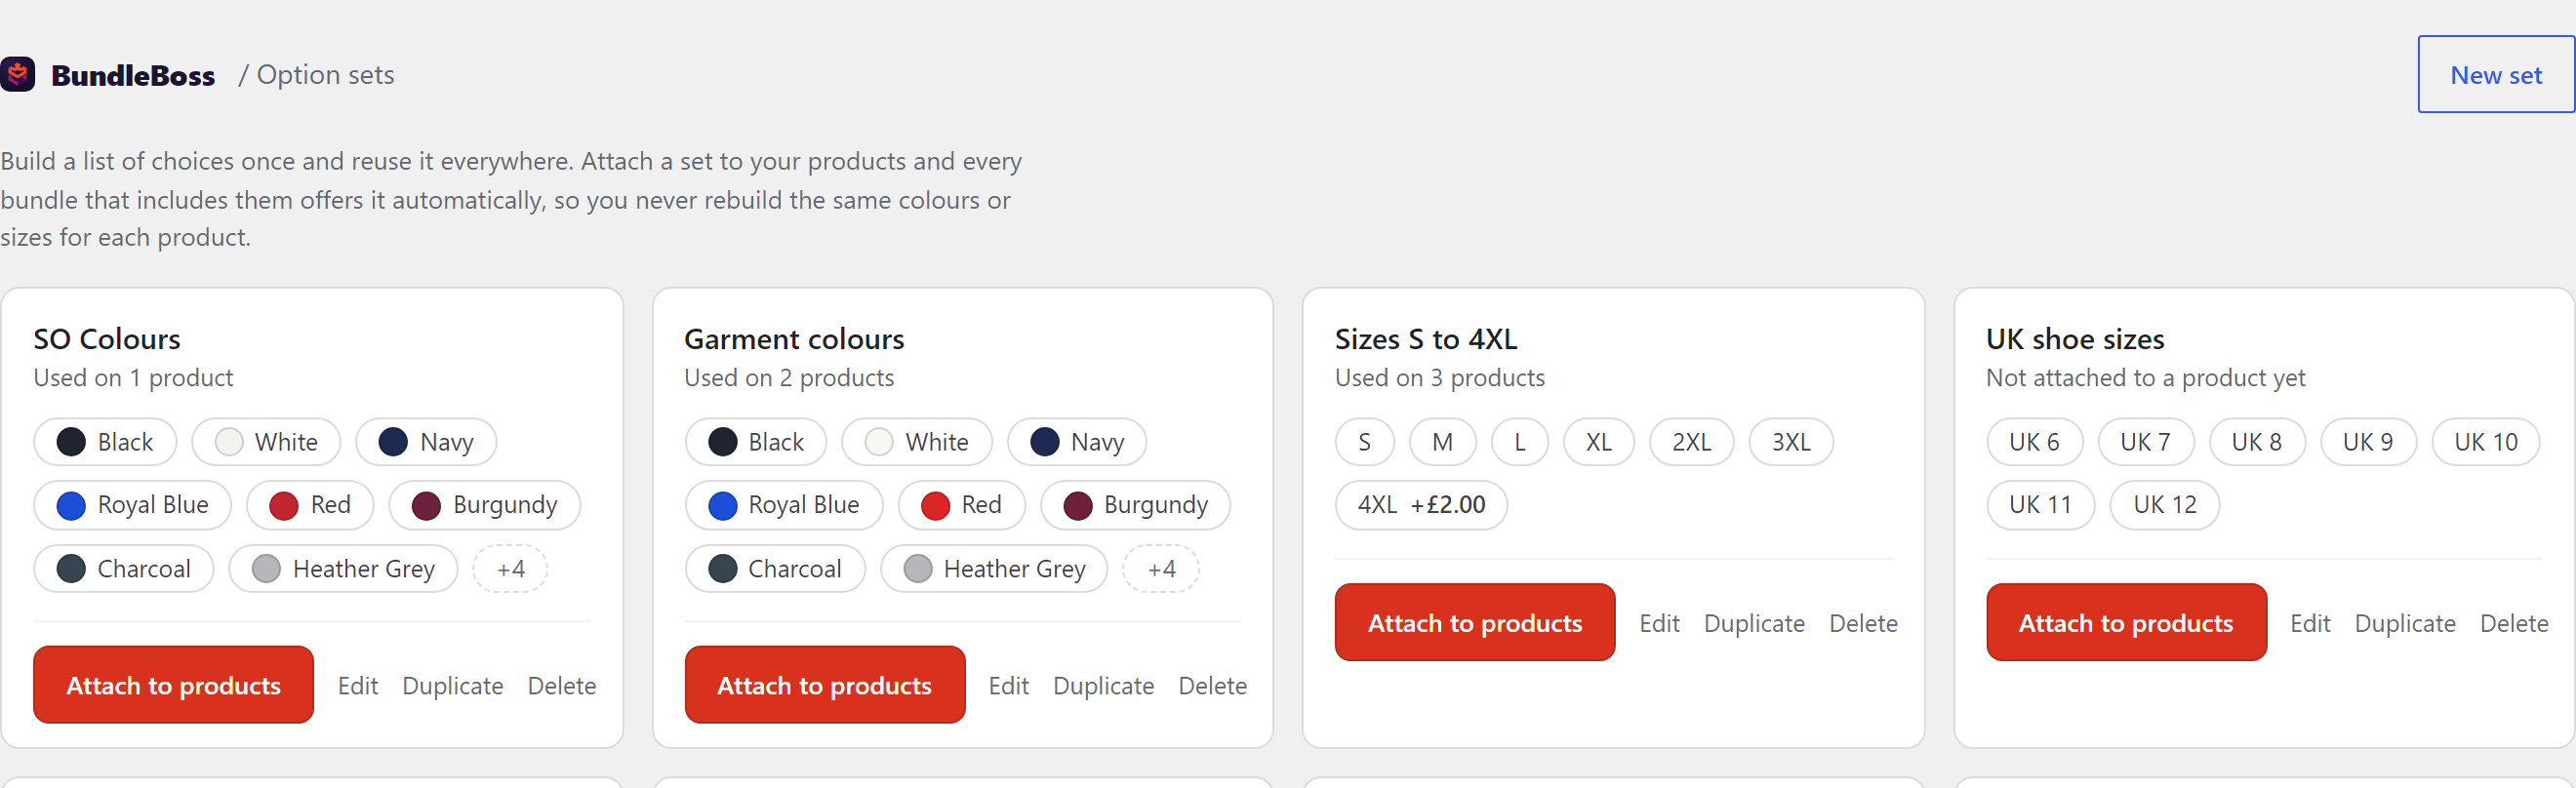
Section titled “Create a set”- Go to BundleBoss → Option sets and click New set, or start from a ready-made one (garment colours, sizes S to 4XL, UK shoe sizes, paper and board sizes, bag weights). A ready-made set imports as your own copy, free to rename, prune or reorder.
- Leave This set is on a list of choices. Add your options. Each has a name and, for colours, a swatch. Leave the swatch blank and BundleBoss fills it in from the name for common colours, the same way swatches work everywhere else.
- Give any option a price where it costs more, say +2.00 for 4XL. Blank means the same as the rest.
Sets live in one place, so editing one later updates every product that uses it. A bundle already in a shopper’s cart keeps the names and prices it was built with.
Attach it to a product
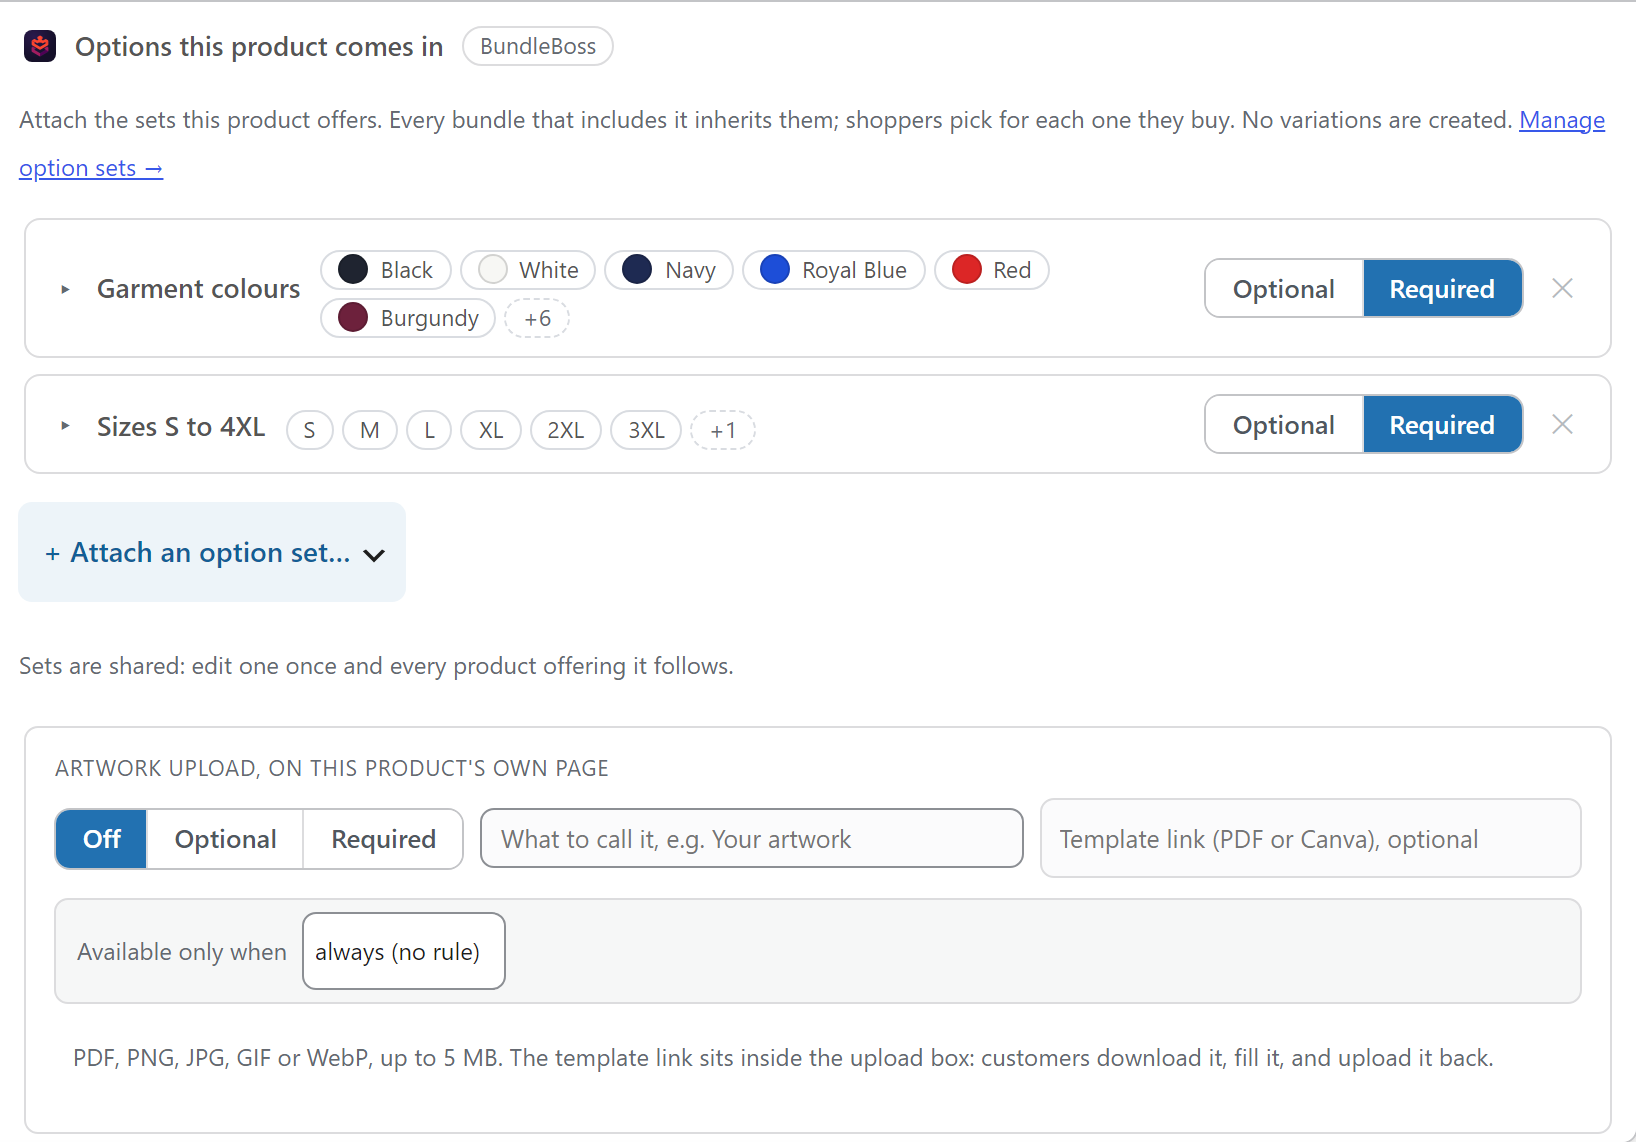
Section titled “Attach it to a product”On a simple product’s edit screen, open the Product options tab:
- Choose a set and attach it. Attach as many as the product needs, a colour set and a size set for a shirt.
- Mark a set Required if the shopper must choose (a size), or leave it optional.
- Override any option's price where this product differs from the set, say 4XL is +4.00 on a heavy hoodie but +2.00 on a tee. Blank uses the set's own price.
That is all the product needs: it now offers the choices on its own page, and every bundle that includes it inherits them.
A product with no price is not purchasable in WooCommerce, so its Add to cart area, and the options with it, never show. Set a price on the General tab and they appear. Zero is a valid price: use it when the options are meant to be the whole price. The Product options tab reminds you if the price is blank.
Order the whole range at once
Section titled “Order the whole range at once”When a product carries a colour and a size, you can turn on a quantity grid on its own page under How customers order this, so a customer sets a quantity for every colour and size and adds the whole run to the basket in one go, instead of one at a time. A further set like printing or a finish is then offered once for the whole order. See the quantity grid for the full picture.
Add fields customers fill in
Section titled “Add fields customers fill in”Beyond a set of choices, a product can take fields: a name to print, a message, a number, a tick box, a dropdown, or a file and logo upload, each optional or required and each able to carry a charge, so an engraving line or a rush fee prices itself right on the page. They sit on the same Product options tab and flow to the order with the rest. See personalisation on a product page.
How the price shows
Section titled “How the price shows”Each choice states its own price right on its chip, so a shopper reads “4XL is £26”, never a surcharge aimed at them. Sizes that cost the same all show the same price, so no single choice is singled out; a set that is all one price (your colours) shows no prices at all. The running total updates with every pick, and the picked options land on the cart line, the order, the confirmation email and the warehouse pick list, named the way the shopper chose them (“Navy / 4XL”).
The price a shopper sees is the product’s price plus the choices. So set the product’s price to your cheapest, everyday version and let the dearer choices add from there. Charges resolve on the server from your saved sets, never from anything the browser sends, and every figure follows your shop’s tax display setting.
On a fixed-price bundle you decide what charges do, with one setting on the Bundle Pricing tab, Option extra charges: keep the total steady whatever the customer picks, or add a dearer option on top like a surcharge.
Give your options a photo
Section titled “Give your options a photo”An option can carry its own photo, so a colour chip shows the garment in that colour, and picking it swaps the product’s main image the way a variation would. You do not have to set them one by one. Suggest photos, on the Product options tab, reads the product’s gallery and your media library and matches a photo to each option by name. A file called black.jpg, or even an image you have simply titled Black, lands on your Black option, and it works the same for sizes and finishes, not only colours. It also knows the trade codes suppliers put in file names, so a photo called RX500-BLK-FRONT finds Black too. Every proposal shows its reason, and nothing changes until you apply and save.
Sell by measured size
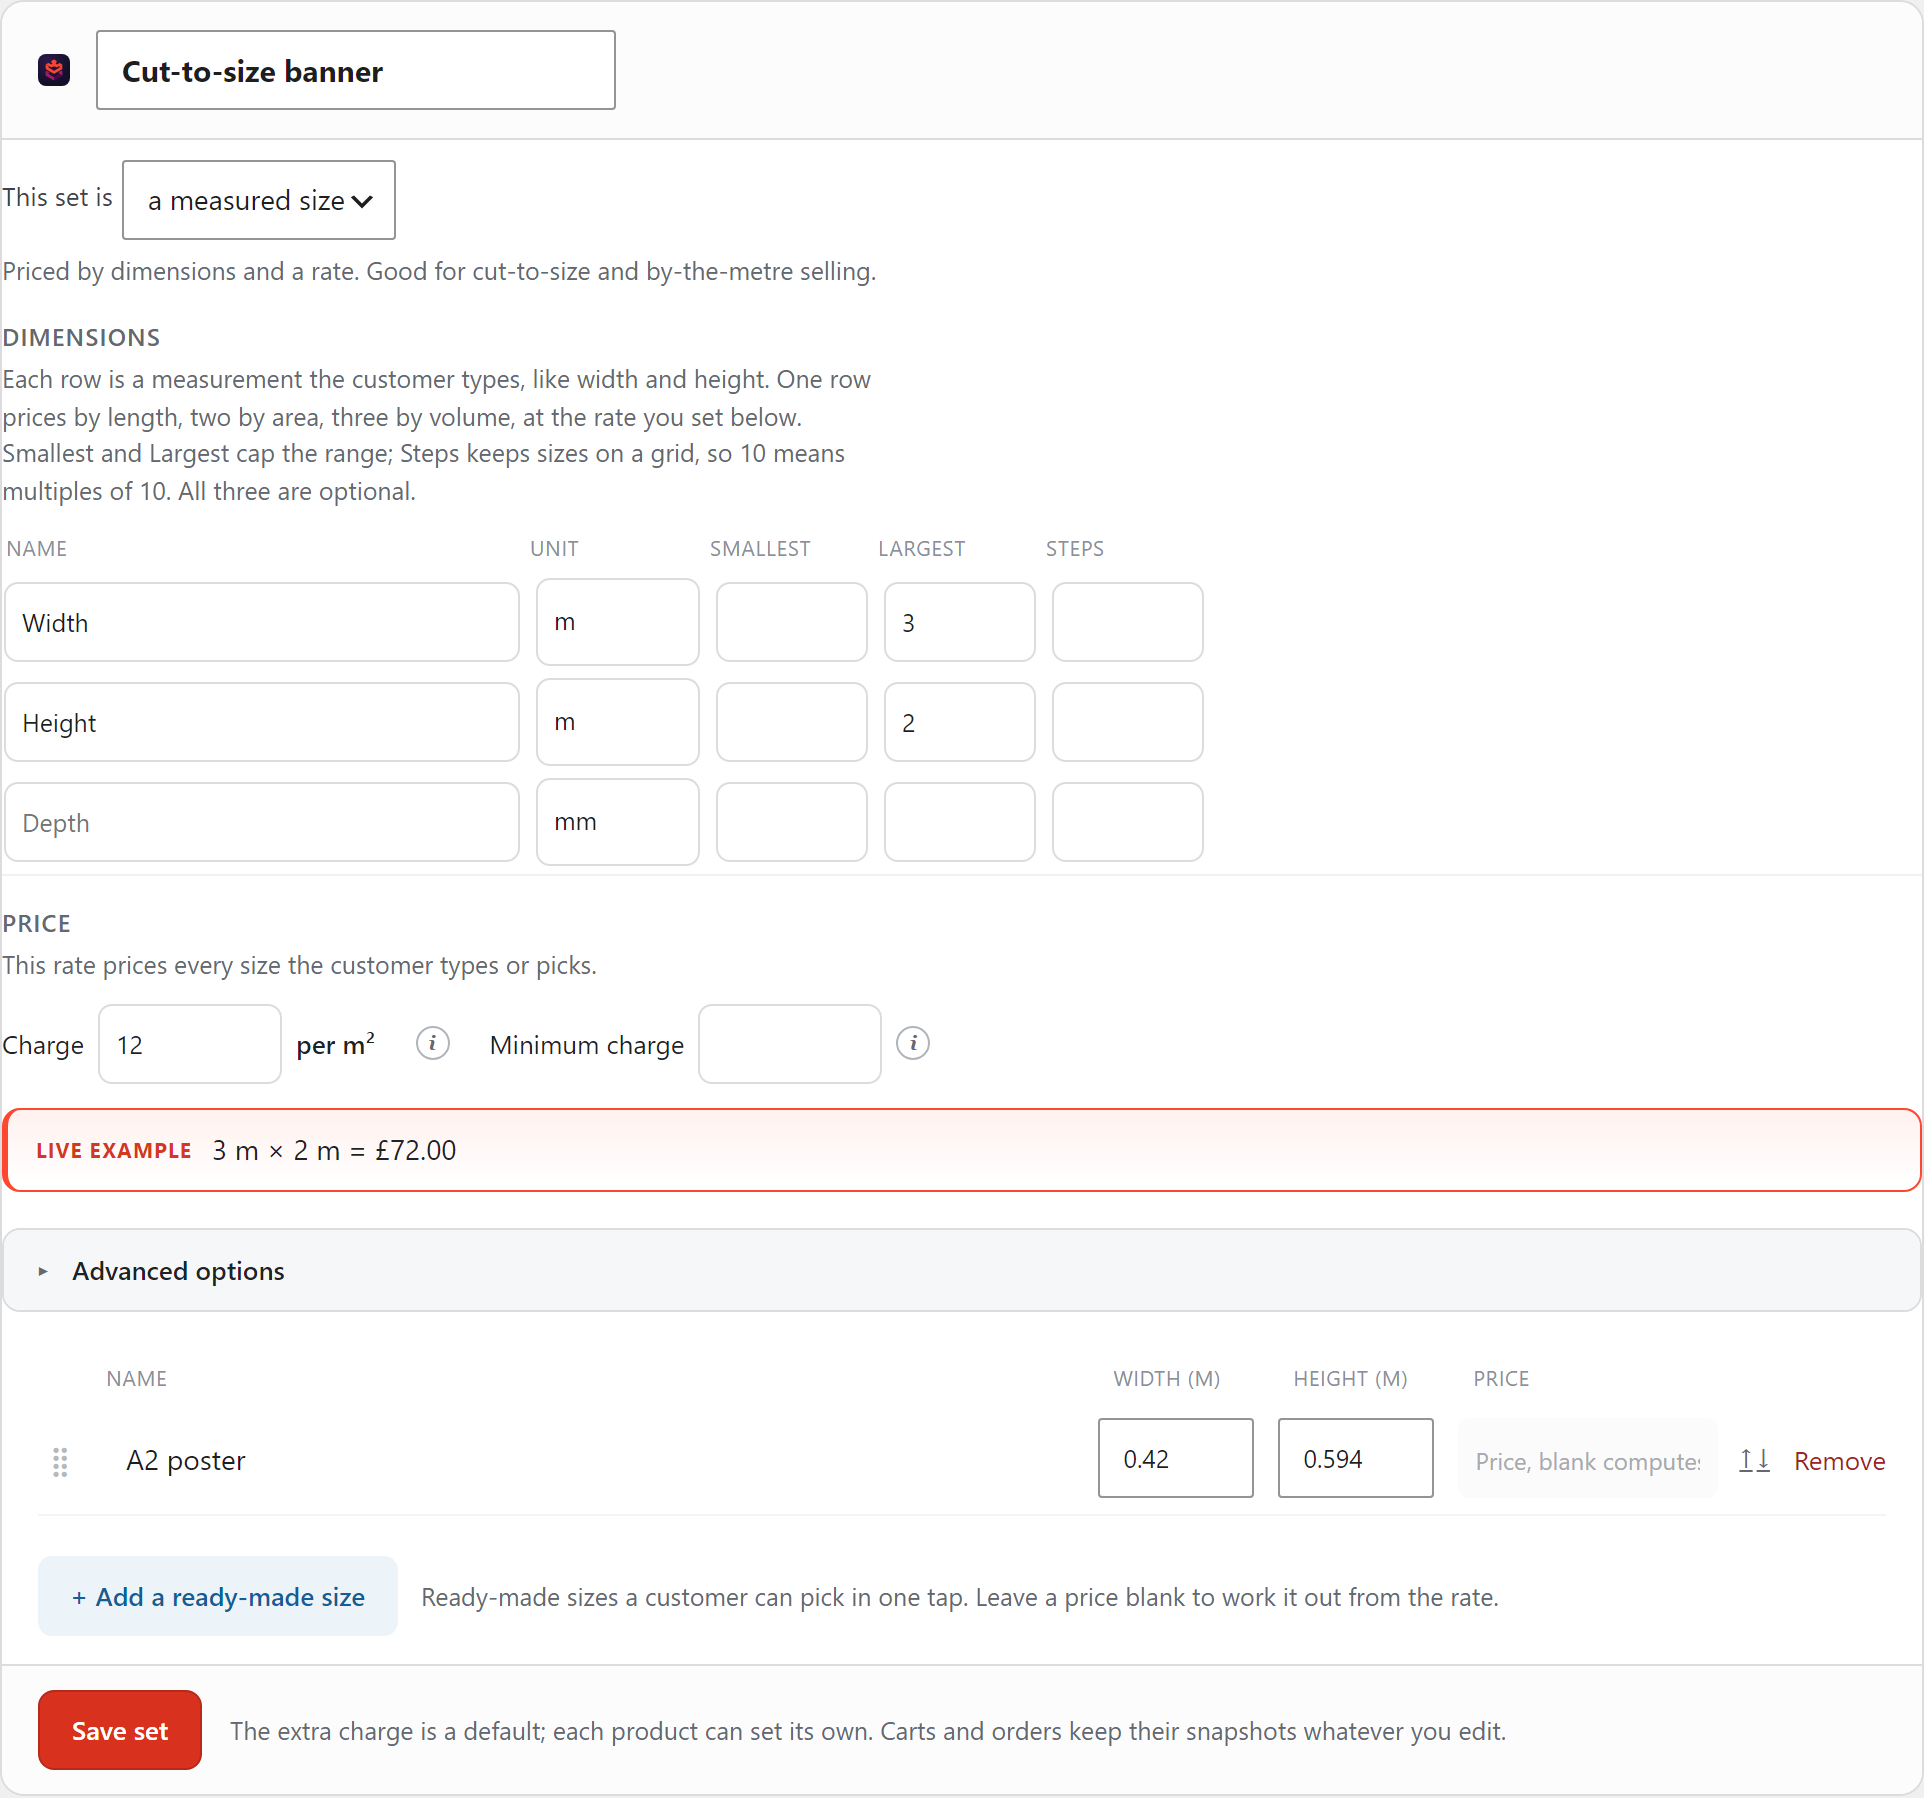
Section titled “Sell by measured size”Choose a measured size for the set kind when the price follows a measurement rather than a fixed list.
- Under Dimensions, name each measurement the customer gives you. One row prices by length (per metre), two by area (per square metre), three by volume. So a cut-to-size banner uses two rows, Width and Height.
- Pick each row's unit (mm, cm, m, or a weight or volume unit). Smallest, Largest and Steps are optional limits: Steps of 10 keeps sizes to sensible multiples of 10.
- Set the rate under Price. Its unit follows your dimensions, so two dimensions price per square metre. A minimum charge is a floor for small sizes, not an amount added on top.
The live example shows what a sample size costs as you type, so you can sanity-check the rate before saving. That one rate prices every size, whether the customer types their own or taps a ready-made size you have set up. Ready-made sizes are shortcuts, priced by the same rate unless you give one its own price. To offer only ready-made sizes and no free typing, untick “Let customers enter their own size” under Advanced.
Make a set available only when another is chosen
Section titled “Make a set available only when another is chosen”A set can wait, shown but locked, until an earlier set has a certain value, so a shopper reads the whole page yet only fills in what applies to them. Set the rule on the later set. On the storefront it sits in place under a plain reason line, like Available when Material is Canvas, and its choices unlock the moment that value is picked. A locked set is inert, so nothing it holds is charged or required, and anything already chosen in it clears, until it unlocks. The same rule can gate the artwork upload.
Collect artwork on the product
Section titled “Collect artwork on the product”A product can take a file upload on its own page, next to the options, for a logo or a print-ready design. Set it up on the Product options tab: a label, the allowed file types and a size limit, and an optional template for the customer to download and fill in. The file rides through to the order and the pick list with the rest of the choices. This is the same upload the personalisation fields offer inside a bundle, here on a plain product page.
On variable products
Section titled “On variable products”A variable product already has variations owning colour, size, stock and photos, so option sets ride along as extras on top, priced per pick, rather than replacing that. Attach them the same way, on the Product options tab. The variation is chosen first; the option prices then add to it.
Attach to a whole category
Section titled “Attach to a whole category”To put the same set on many products at once, open a set on the Option sets page and use Attach to products: pick a category and BundleBoss attaches the set to every simple product in it, skipping any that already offer it. Handy for rolling a colour or size set across a whole range in one go.
Inside bundles
Section titled “Inside bundles”In a stacked bundle each unit carries its own choices, so three hoodies in a pack can each be a different colour and size, and a build-a-box card offers the choices before the item goes in the box. Because an optioned product behaves like a variable one, the unit layouts you already know all work with it, including the quantity grid for a size run typed straight in.
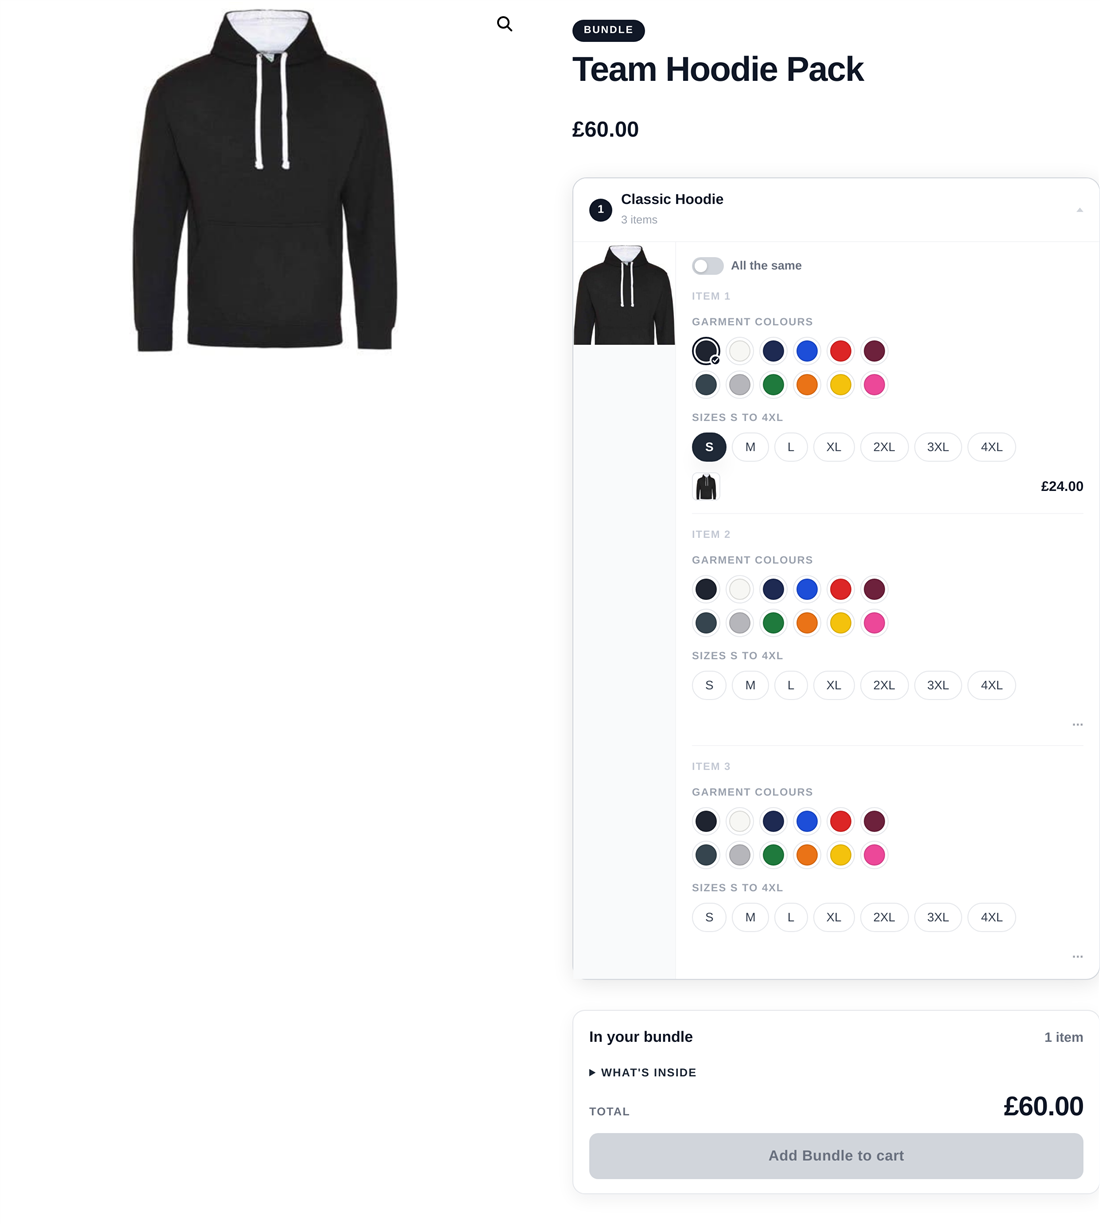
To narrow what one bundle offers, open the bundle item’s Options customers can pick: offer a subset (“summer range” shows three colours of the twelve), or switch a set off in that bundle only. The narrowing applies to what the shopper sees and to what the server accepts, so a hidden option can never be slipped in.
Move sets between stores
Section titled “Move sets between stores”Sets live on the store, not on a single product, so a bundle export does not carry them on its own. On the Option sets page, Export all sets downloads the library as one file, and Import sets on another store recreates them with their identity intact, so any product already attached lines up. Handy for staging sites and agency work; it pairs with the wider import and export tools.
Coming from an add-ons plugin? Option sets give the same "options on a simple product" without the variation pile, and the picks carry through to a proper pick list.